
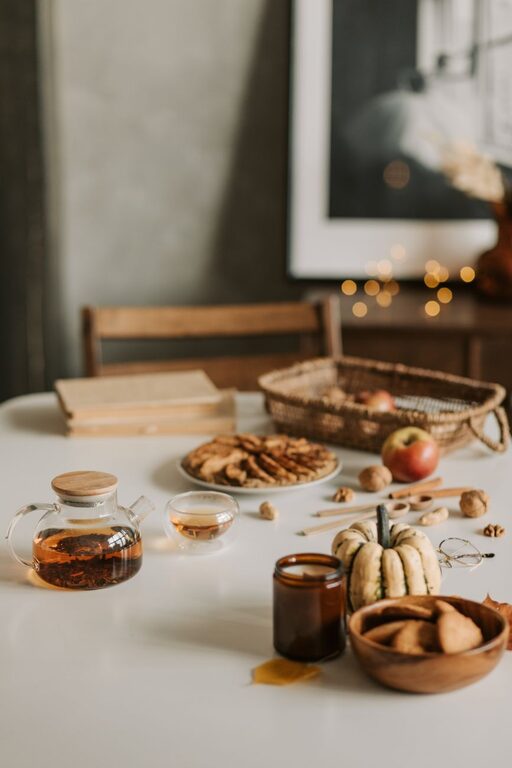
Sharing a homemade dish online is about more than showing what is on your plate. A well-taken food photo can capture texture, color, and the care that went into preparing the meal. The good news is that you do not need an expensive camera or a professional kitchen to create appealing images.
With natural light, a tidy setup, and a few simple techniques, you can make your everyday dishes look fresh and inviting. Use these practical food photography tips to improve your photos before sharing them on a blog or social media.
Start With Good Natural Light
Light is one of the most important parts of food photography. It brings out the colors and textures of your dish, while poor lighting can make food look dull or overly harsh.
A bright window is often all you need. Place your food near the window, but avoid direct sunlight if possible. Strong sunlight can create hard shadows and bright spots that distract from the dish.
Try these simple lighting ideas:
– Place the food beside a window rather than directly in front of it.
– Use a thin curtain to soften strong sunlight.
– Take photos in the morning or late afternoon for gentler light.
– Turn off overhead lights if they create a yellow or uneven color.
– Move the plate a few inches at a time to find the best position.
Side lighting works well for many dishes because it highlights texture. For example, it can show the layers in a sandwich, the crisp edges of roasted vegetables, or the surface of a bowl of soup. Light from behind can create a bright, airy look, but you may need to adjust your camera so the food does not appear too dark.
Choose a Simple Background
The background should support the food without competing with it. A plain table, wooden board, neutral cloth, or clean countertop can provide enough interest while keeping attention on the dish.
Before taking your photo, look around the edges of the frame. Remove items that do not add to the scene, such as used utensils, packaging, cords, or unrelated kitchen tools.
Good background options include:
– A wooden cutting board
– A light or neutral tablecloth
– A plain ceramic plate
– A sheet of clean paper or fabric
– A countertop with a subtle texture
You can also use a background that contrasts with the food. A pale plate may stand out against a dark table, while colorful food can look especially fresh on a simple white surface. Avoid backgrounds with bold patterns unless they are part of the story you want to tell.
Pick the Right Camera Angle
Different dishes look better from different angles. Experiment with your phone or camera instead of relying on one position for every meal.
A top-down view works well for flat arrangements, such as a table filled with small dishes, a pizza, or a colorful salad. It clearly shows the shape and layout of the food.
A 45-degree angle is useful for plates, bowls, and meals with height. This view lets you see both the top of the dish and its sides. It often feels natural because it resembles the way people see food while sitting at a table.
A low angle can make a tall dish look more impressive. Try it with layered desserts, burgers, stacked pancakes, or a bowl filled with toppings.
As you test angles, take several quick photos. Small changes in height and distance can make a noticeable difference.
Keep the Composition Balanced
Composition describes how the elements are arranged in the frame. A balanced photo feels organized and easy to view.
Start by placing the main dish slightly off-center. This can create a more natural image than placing everything directly in the middle. You can also use the rule of thirds by imagining two horizontal and two vertical lines across the frame. Place the main subject near one of the points where the lines meet.
Leave some open space around the dish, especially if you plan to add text or crop the image later. At the same time, avoid leaving so much empty space that the food feels lost.
Helpful composition techniques include:
– Place one main dish in focus.
– Add only a few supporting items.
– Use repeated shapes, such as several berries or slices of bread.
– Arrange utensils so they lead the eye toward the food.
– Keep the edges of the frame clean.
Remember that simple is often stronger. A carefully arranged plate with one or two thoughtful details can look more appealing than a crowded table.
Add Natural Styling Details
Food styling does not have to be complicated. Small finishing touches can make a dish look fresher and more complete.
Consider adding ingredients that are already part of the recipe. Sprinkle chopped herbs over pasta, place a few berries beside a dessert, or add a lemon wedge to a seafood dish. These details can help viewers understand the ingredients and flavors.
You can also include a few useful props:
– A fork or spoon
– A linen napkin
– A small bowl of ingredients
– A cutting board
– A serving utensil
– A glass or mug that fits the mood
Use props sparingly. They should create context, not distract from the main dish. If an item does not help tell the story, remove it.
Make the Food Look Fresh
Timing can affect the appearance of your photo. Some foods look best immediately after cooking, while others need a few minutes to settle.
Capture steam soon after serving, but be careful not to let condensation cover the lens. For salads, add delicate greens and toppings just before taking the photo. For baked goods, allow them to cool enough to hold their shape while still looking fresh.
Before shooting, check the plate for small smudges or spills. Wipe the rim with a clean cloth or paper towel. Add sauces, herbs, or toppings at the last moment so they look bright and defined.
Use Your Phone Camera Effectively
Modern phone cameras can produce excellent food photos when used carefully. Clean the lens first, since fingerprints can make images look hazy.
Tap the screen on the main subject to set focus. If the image looks too bright or too dark, adjust the exposure using the slider that appears on many camera apps. Avoid using digital zoom because it can reduce image quality. Instead, move closer to the food when possible.
Try these phone camera habits:
– Hold the phone with both hands.
– Keep the camera level when photographing bowls and plates.
– Use the grid feature to help with alignment.
– Take several versions of the same setup.
– Avoid heavy filters that change the food’s natural color.
Edit With a Light Touch
A small amount of editing can improve a photo while keeping it realistic. Most phone editing tools offer basic adjustments for brightness, contrast, color, and cropping.
Begin by correcting the exposure. Then adjust the warmth if the food looks too blue or too yellow. A slight increase in contrast can help details stand out, but too much can make the image look harsh.
Crop away distractions and straighten the image if the table or plate appears tilted. Avoid making colors extremely bright or saturated. The goal is to show the dish as it looks, not create an unrealistic version of it.
Practice With Everyday Meals
You do not need a special recipe to practice food photography. Try photographing breakfast, leftovers, a cup of coffee, or a simple snack. Each meal gives you a chance to test light, angles, backgrounds, and composition.
Take notes about what works. You may discover that your kitchen has one window with especially good light or that certain plates suit your dishes better than others. Over time, you will develop a consistent style that makes your photos recognizable.
The best food photos feel welcoming and genuine. Keep the setup simple, work with the light you have, and focus on showing the care behind your homemade dish. A few thoughtful choices can turn an ordinary meal into an image that makes people want to pull up a chair.